

Step-by-Step Guide
Sign In to Zendesk
Sign in to your Zendesk account and open the support workspace.
Make sure you have access to the ticket you want to manage and that the HelloSend app has already been installed and connected to your Zendesk account.

Add the HelloSend Channel App
After successfully installing the HelloSend Zendesk Marketplace app, you must also configure the HelloSend Channel app.
- In Zendesk Admin Center, go to Apps and Integrations → Channel apps.
- Open HelloSend Configuration.
- Select the Accounts tab.
- Click Add account.
- Once connected, your HelloSend account will appear under Active accounts, and the channel will be ready to use.
Open a Customer Ticket
Open the Zendesk ticket for the customer you want to message.
HelloSend uses the customer details available in the ticket, including the phone number, to help you start a one-on-one conversation.
Before continuing, check that the ticket contains the correct customer phone number.
Open the HelloSend Extension
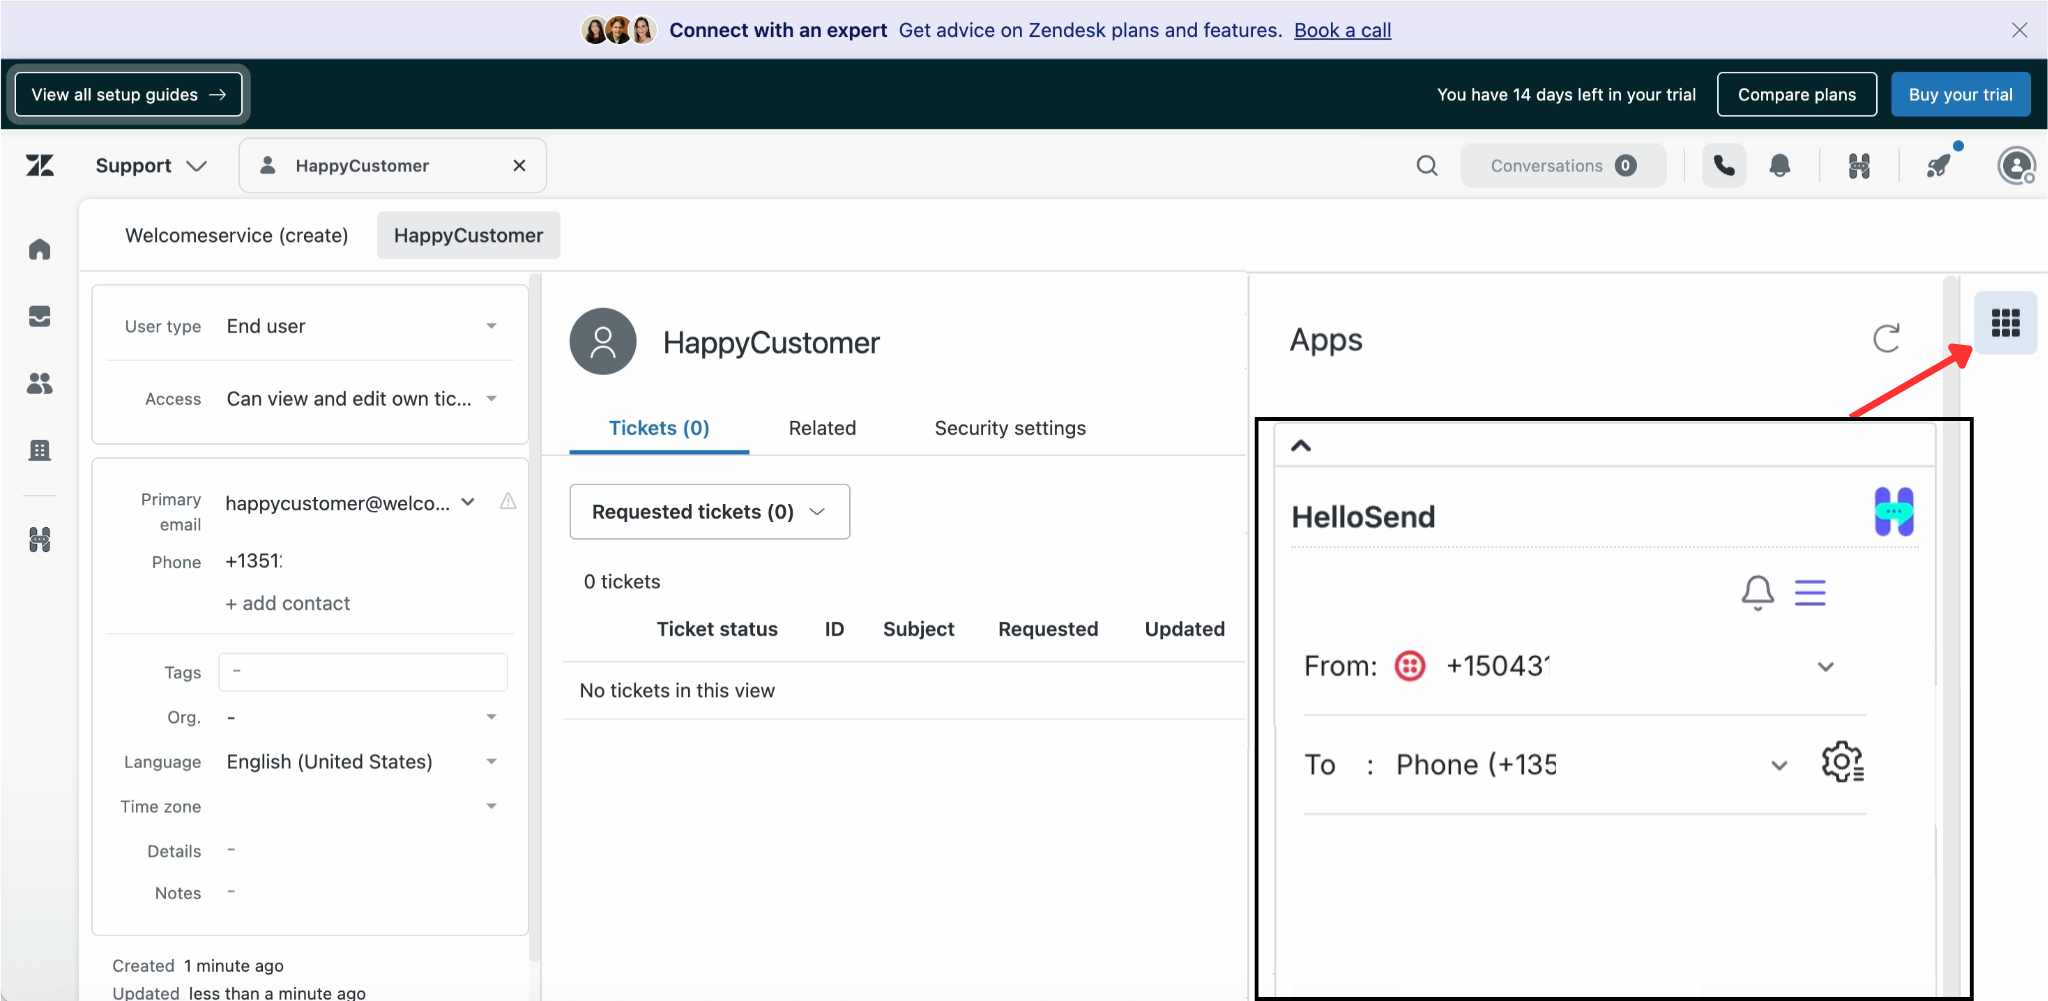
Locate the HelloSend app within the Zendesk ticket and open it.
The HelloSend messaging panel will appear inside the ticket interface, allowing you to send messages without moving to another application.
Select the From Number
Choose the From Number you want to use.
The From Number is the connected SMS, WhatsApp, or other supported messaging number from your HelloSend account.
If multiple numbers are available, select the number that matches the correct team, department, location, or communication channel.
Verify the Customer Number
The customer's phone number will be automatically populated in the To Number field based on the information available in the Zendesk ticket.
Review the number before sending the message.
If more than one phone number is available, select the appropriate number for the customer.
Enter a Personalized Message
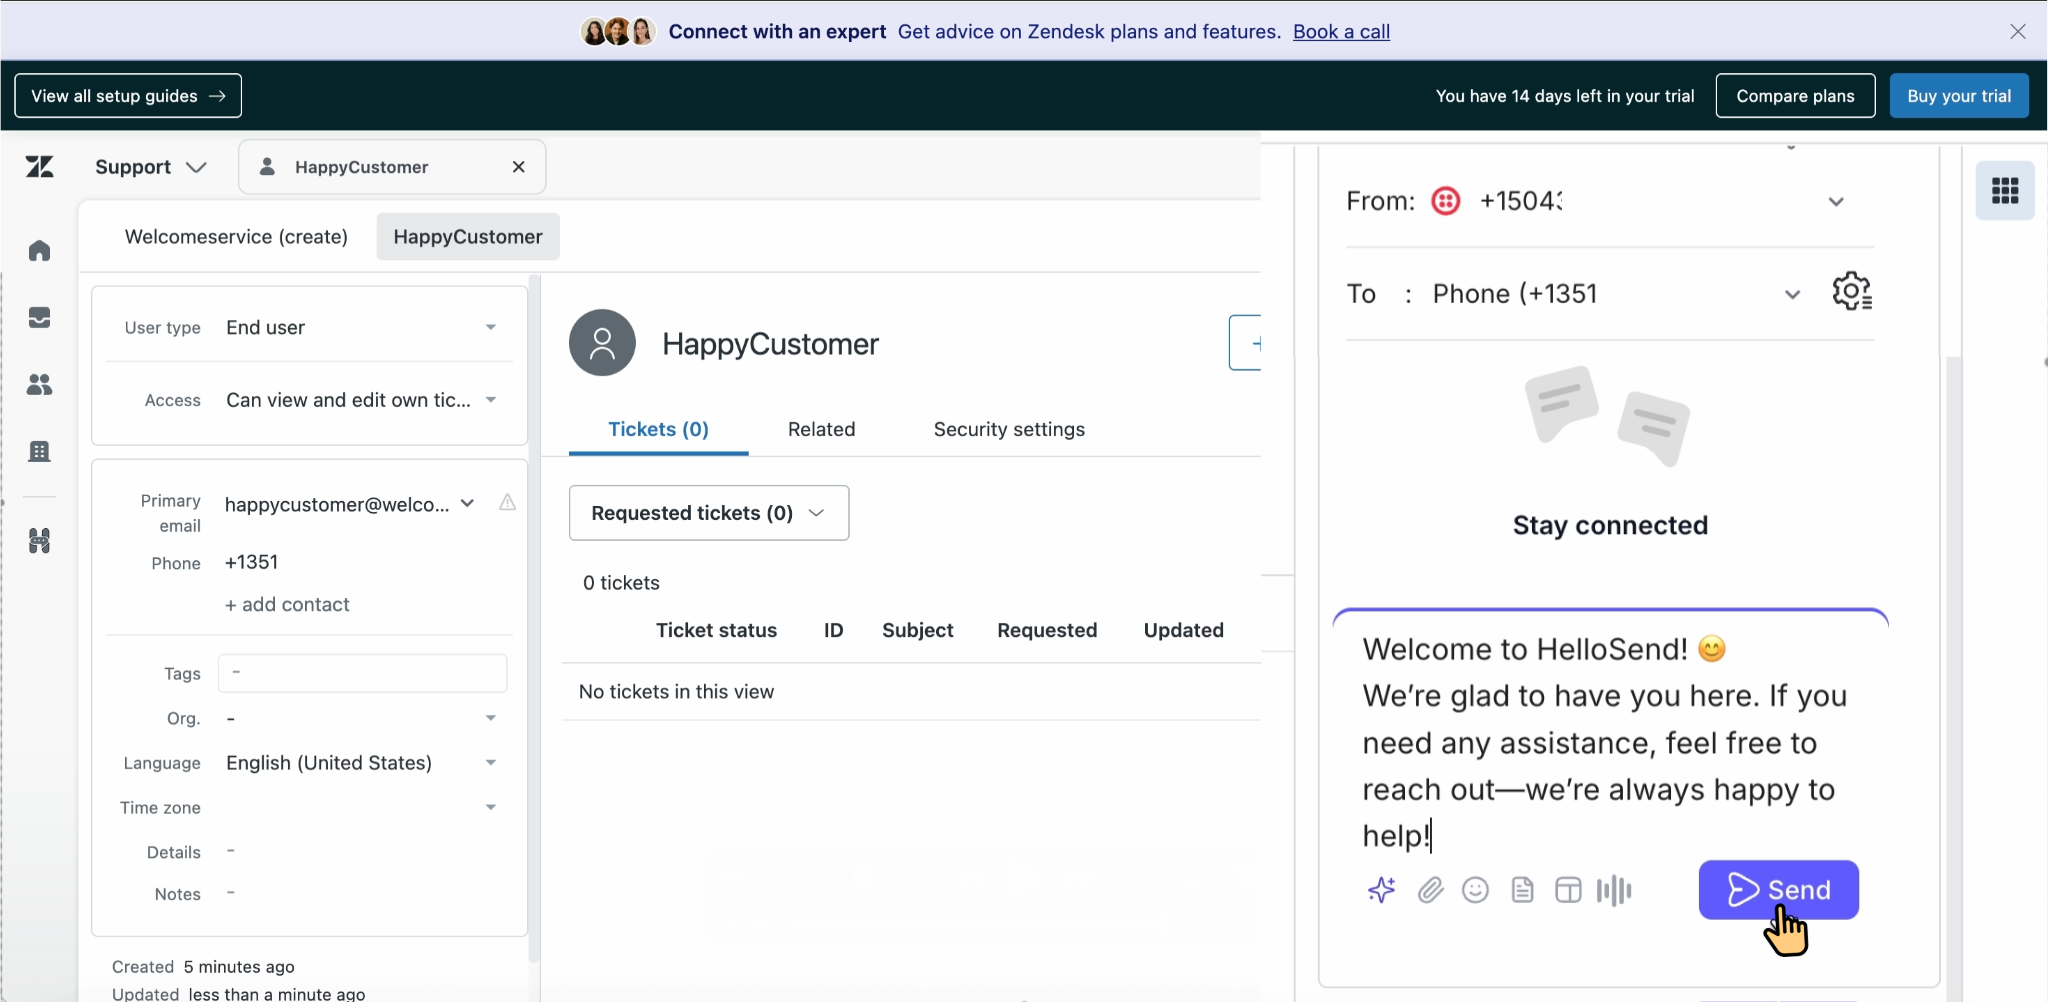
Type your message in the message box.
You can write a personalized response based on the customer's question, ticket status, support request, or previous conversation.
Clear and relevant messages help customers understand the next step and improve the overall support experience.
Select a Message Template
You can also choose a predefined message template instead of typing the full message manually.
Templates are useful for frequently sent messages such as:
- Ticket acknowledgements
- Support updates
- Appointment reminders
- Follow-up messages
- Resolution confirmations
- Payment or delivery notifications
After selecting a template, review the content and personalize it when needed.
Review the Message
Before sending, confirm the following details:
- The correct From Number is selected
- The customer's phone number is correct
- The message content is accurate
- The selected template is appropriate
- Any required personalization has been added
Reviewing the message helps avoid sending incorrect information to the customer.
Send the Message
Once everything looks correct, click Send.
HelloSend will send the message directly to the customer from the Zendesk ticket.
This allows the support agent to continue working on the ticket while communicating with the customer from the same screen.
View the Conversation in Zendesk
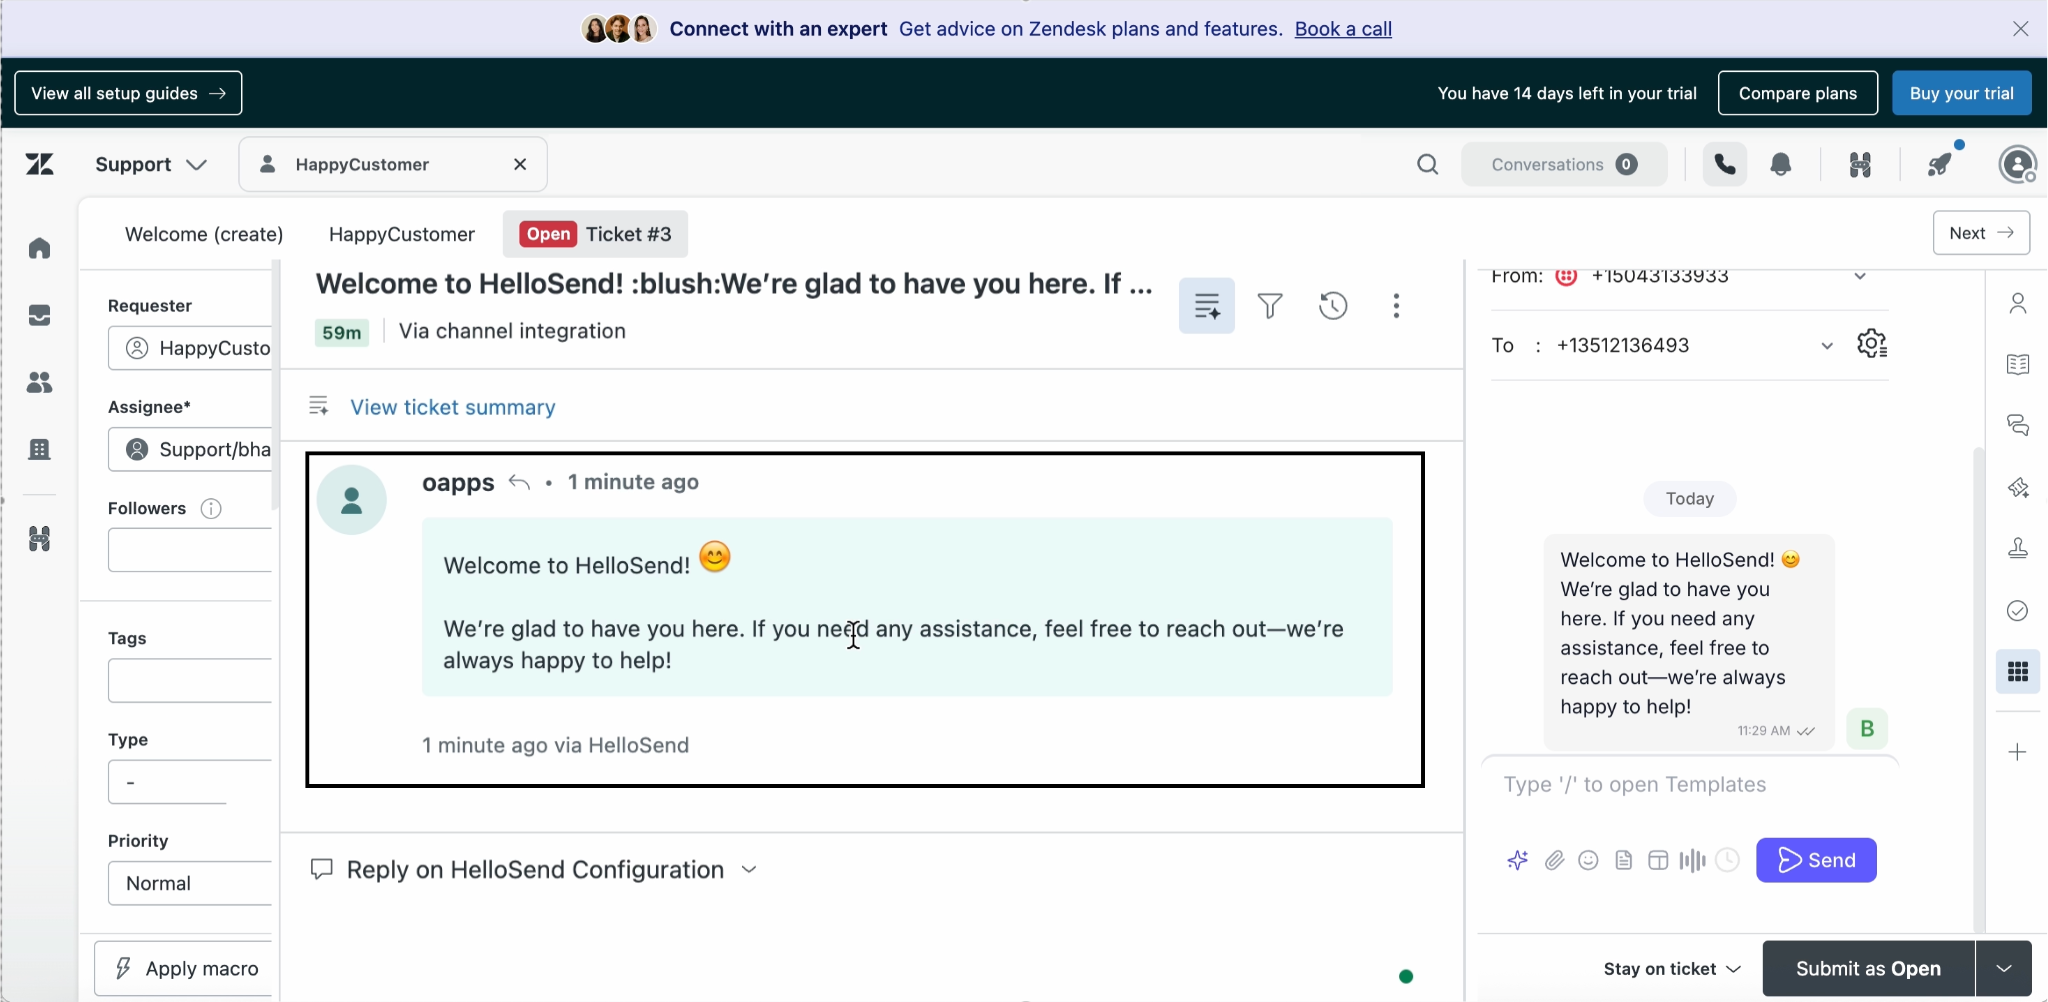
After the message is sent successfully, the conversation will be recorded and displayed within Zendesk.
Agents can review sent and received messages, track the communication history, and continue the conversation from the relevant ticket.
Keeping the conversation connected to the ticket gives agents better context and helps the team avoid repeating questions or missing important updates.
Benefits of One-on-One Messaging with HelloSend for Zendesk
-
Communicate directly from Zendesk: Send customer messages from tickets without switching to external messaging platforms.
-
Respond faster: Access customer details, compose messages, and send updates from one workspace.
-
Personalize customer support: Send messages based on each customer’s ticket, issue, status, and support needs.
-
Use reusable templates: Save time with predefined messages while maintaining consistent communication across the team.
-
Manage multiple sending numbers: Choose the appropriate From Number for different departments, regions, teams, or messaging channels.
-
Keep conversations organized: Store customer communication alongside the related Zendesk ticket for easier tracking and follow-up.
-
Maintain complete context: Give agents visibility into previous messages so they can provide more informed support.
-
Improve customer experience: Deliver faster, clearer, and more relevant updates through the customer’s preferred messaging channel.
-
Reduce manual work: Avoid copying customer details or moving between Zendesk and separate communication tools.
Conclusion
HelloSend for Zendesk makes one-on-one customer messaging easier by bringing SMS, WhatsApp, and other supported communication channels directly into Zendesk tickets.
Support agents can select a sending number, verify the customer’s phone number, create personalized messages, use templates, and track the full conversation without leaving Zendesk. This helps businesses reduce manual work, improve response times, and keep every customer interaction connected to the support workflow.



.webp)
