Step-by-Step Guide
A. Create the drip in HelloSend
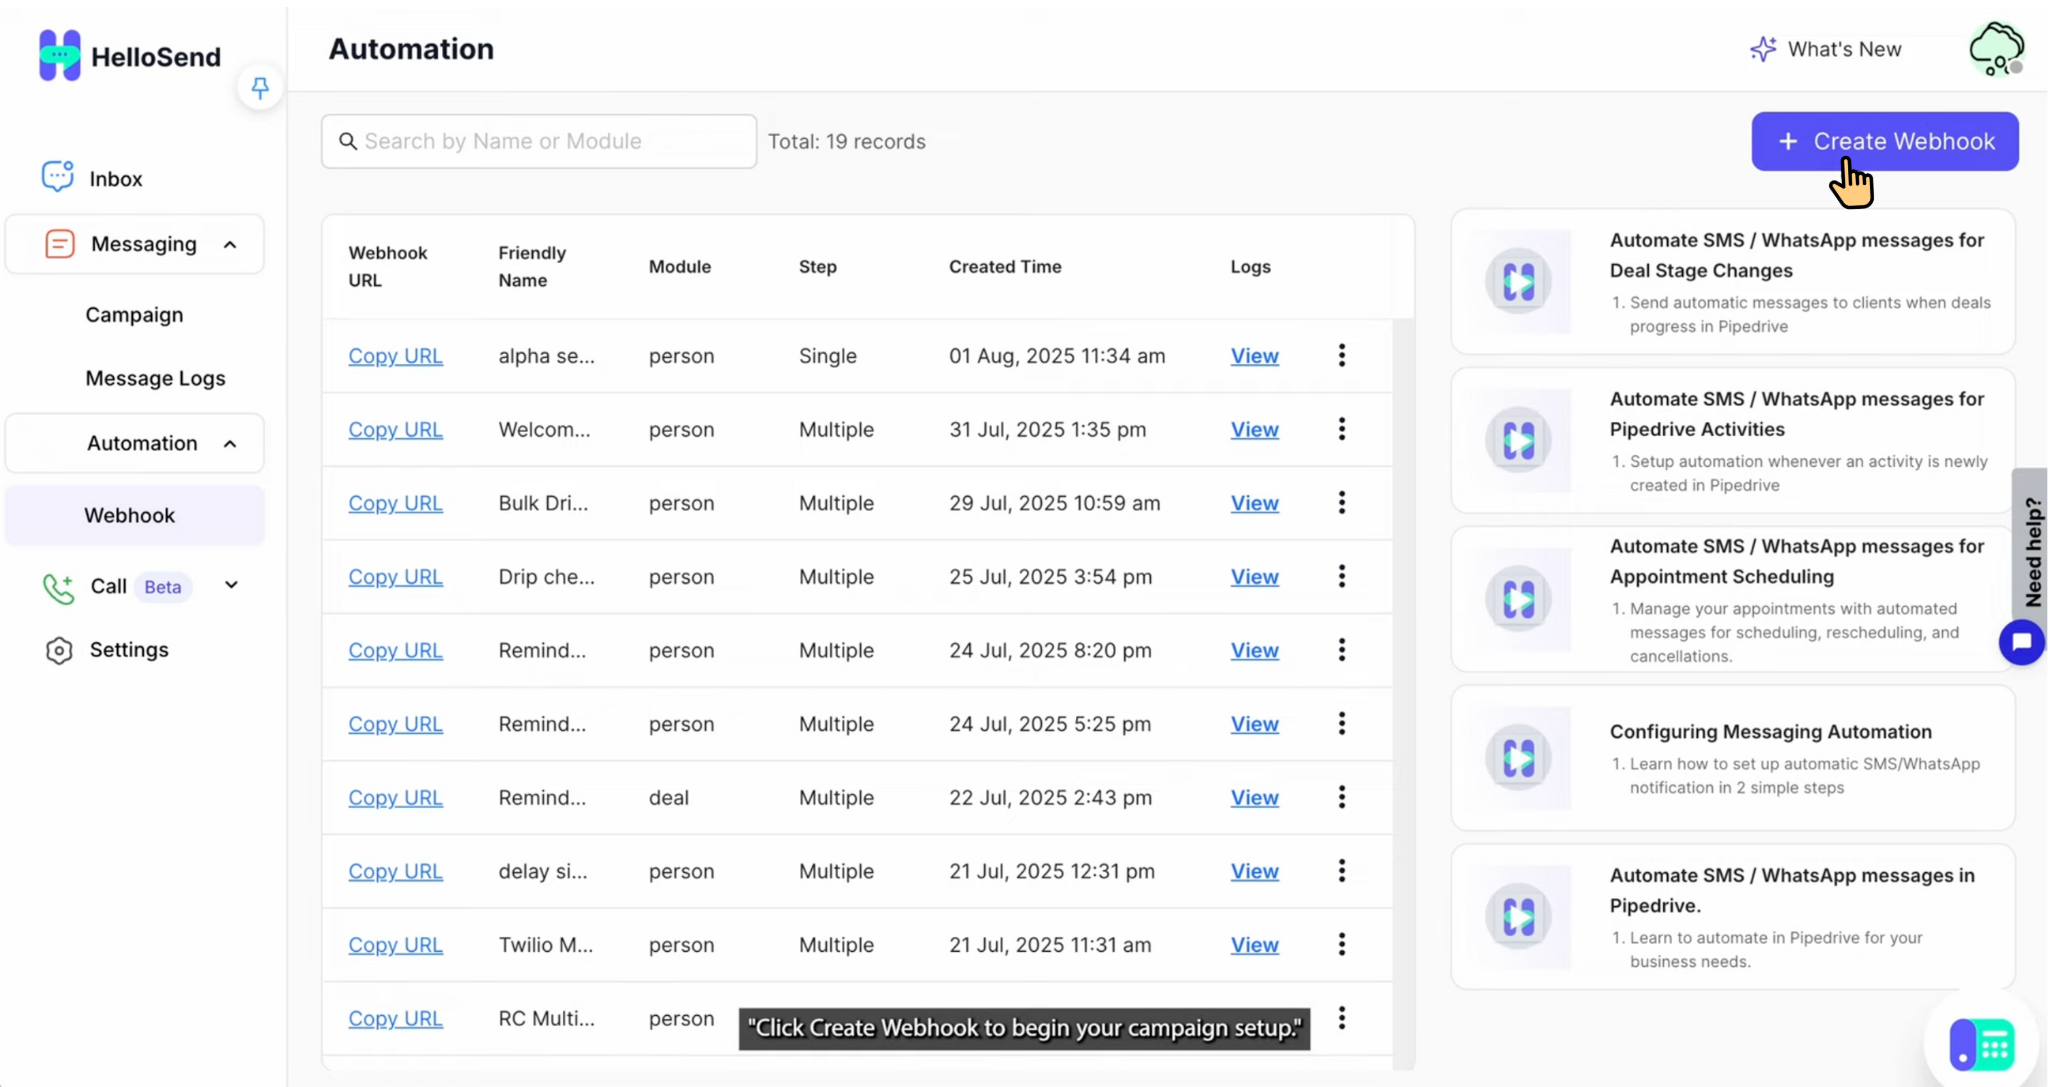
1Open Automation
Go to HelloSend → Messaging → Automation → Webhook and click Create Webhook.
2Configure Basics for HelloSend Drip Campaigns
- Name: Assign a clear and descriptive name (e.g., Welcome Message) so campaigns are easy to identify.
- Sender Number: Select the number you want to use. This can be either your SMS | WhatsApp | RCS | Twilio WhatsApp number.
- CRM Module: Choose the source module such as Leads, Contacts, or Deals to define which records will trigger the automation.
- Phone Field: Specify the exact phone field from your CRM record that HelloSend should use for message delivery.
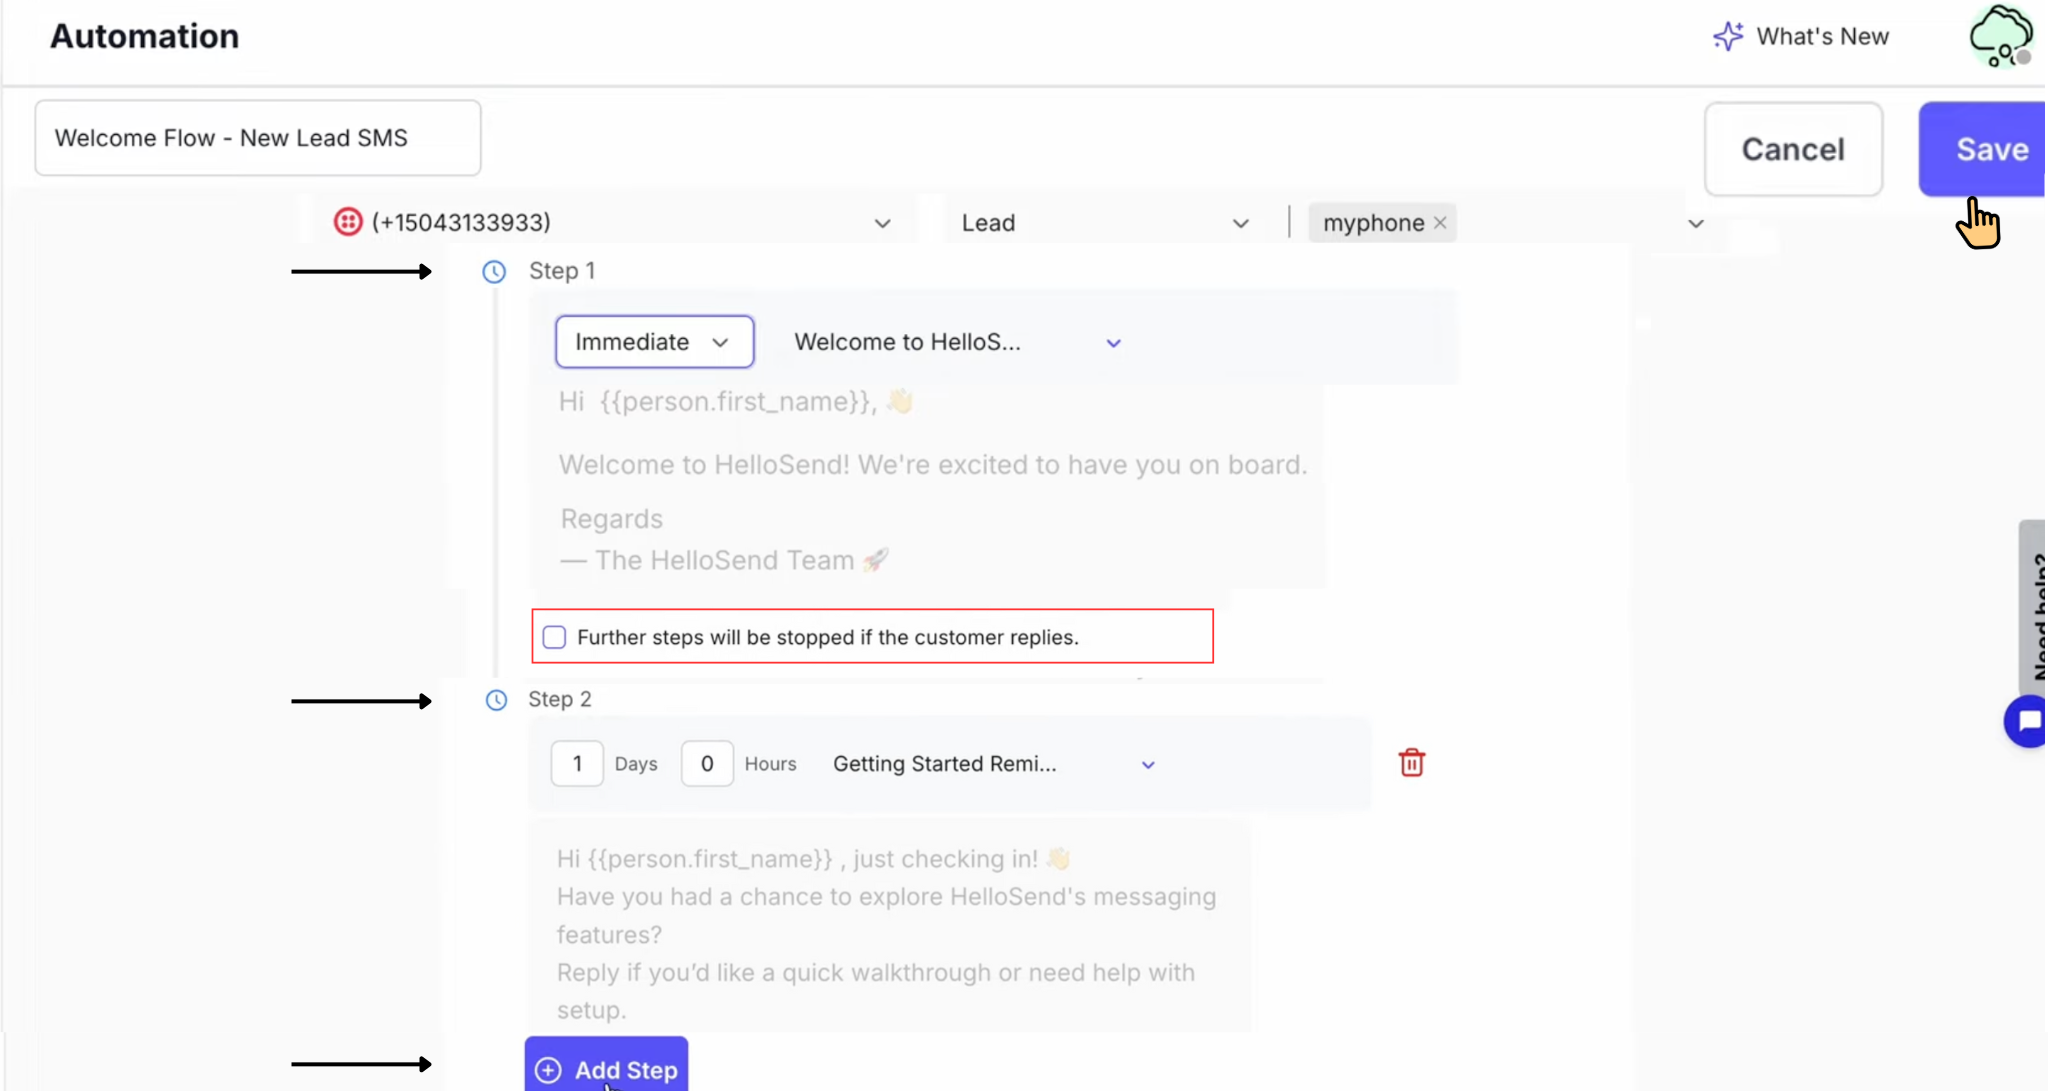
3Build Your Steps in HelloSend Drip Campaigns
When creating a drip campaign in HelloSend, you can design a sequence of automated SMS | WhatsApp | RCS | Twilio WhatsApp messages that run on a schedule. Each step can be customized with its own delay, template, and reply handling rules.
- Step 1 Send a welcome message immediately after the trigger or add a short delay. Choose a saved template for consistent communication.
- Step 2 Create a follow-up message (e.g., after 1 day) to re-engage the customer.
- Reply Handling At any step, you can enable the option to stop the campaign if the customer replies, preventing unnecessary or duplicate follow-ups.
- Activation Once all steps are configured, click Save to activate your drip campaign and start automating customer engagement.
4Save & copy webhook URL
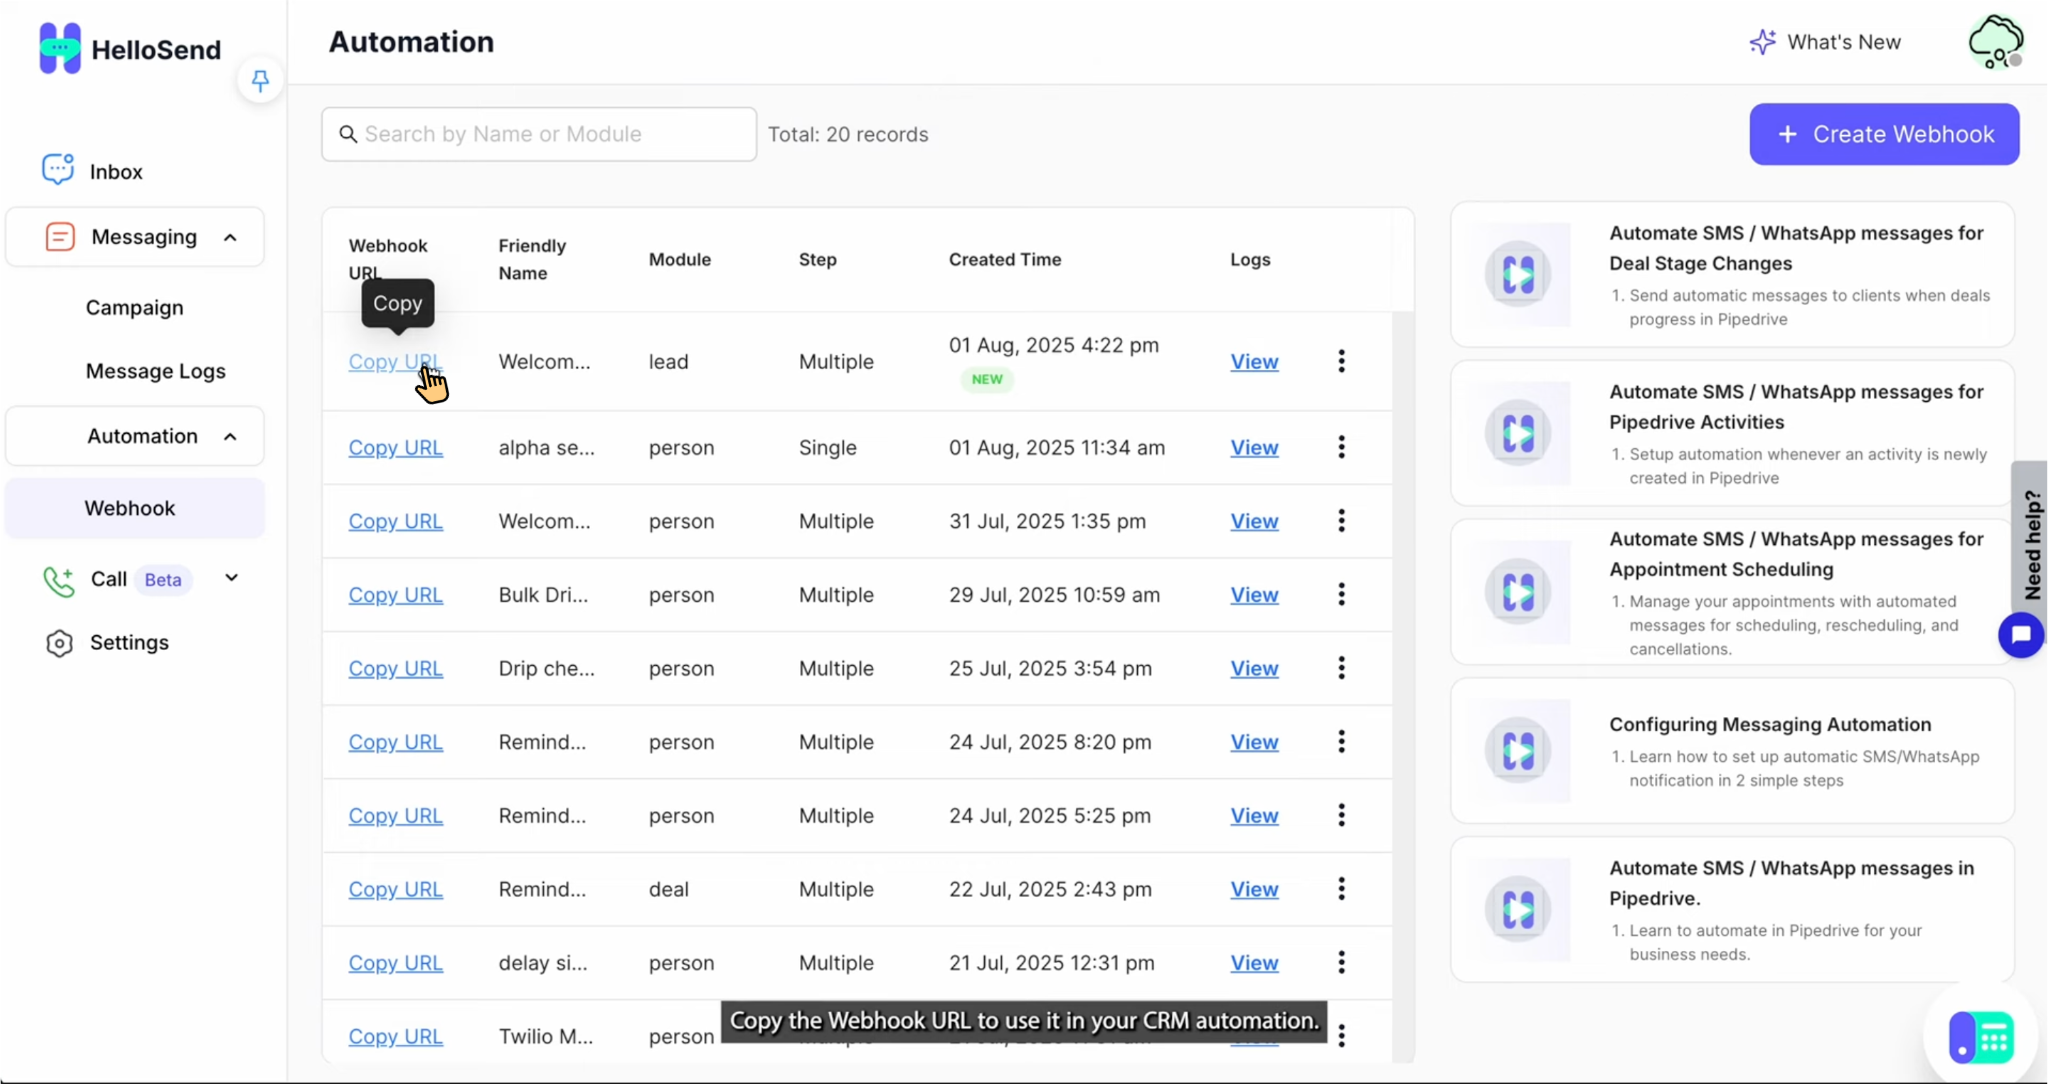
- After Save, your Drip Campaign is created and listed in the Automation Table.
- Click Copy URL. You'll paste this into your Zoho desk webhook(URL to notify).
Set Up Automation in Zoho Desk
Prerequisites
- Admin access in Zoho Desk and HelloSend
- Your HelloSend Webhook URL (from HelloSend → Automations)
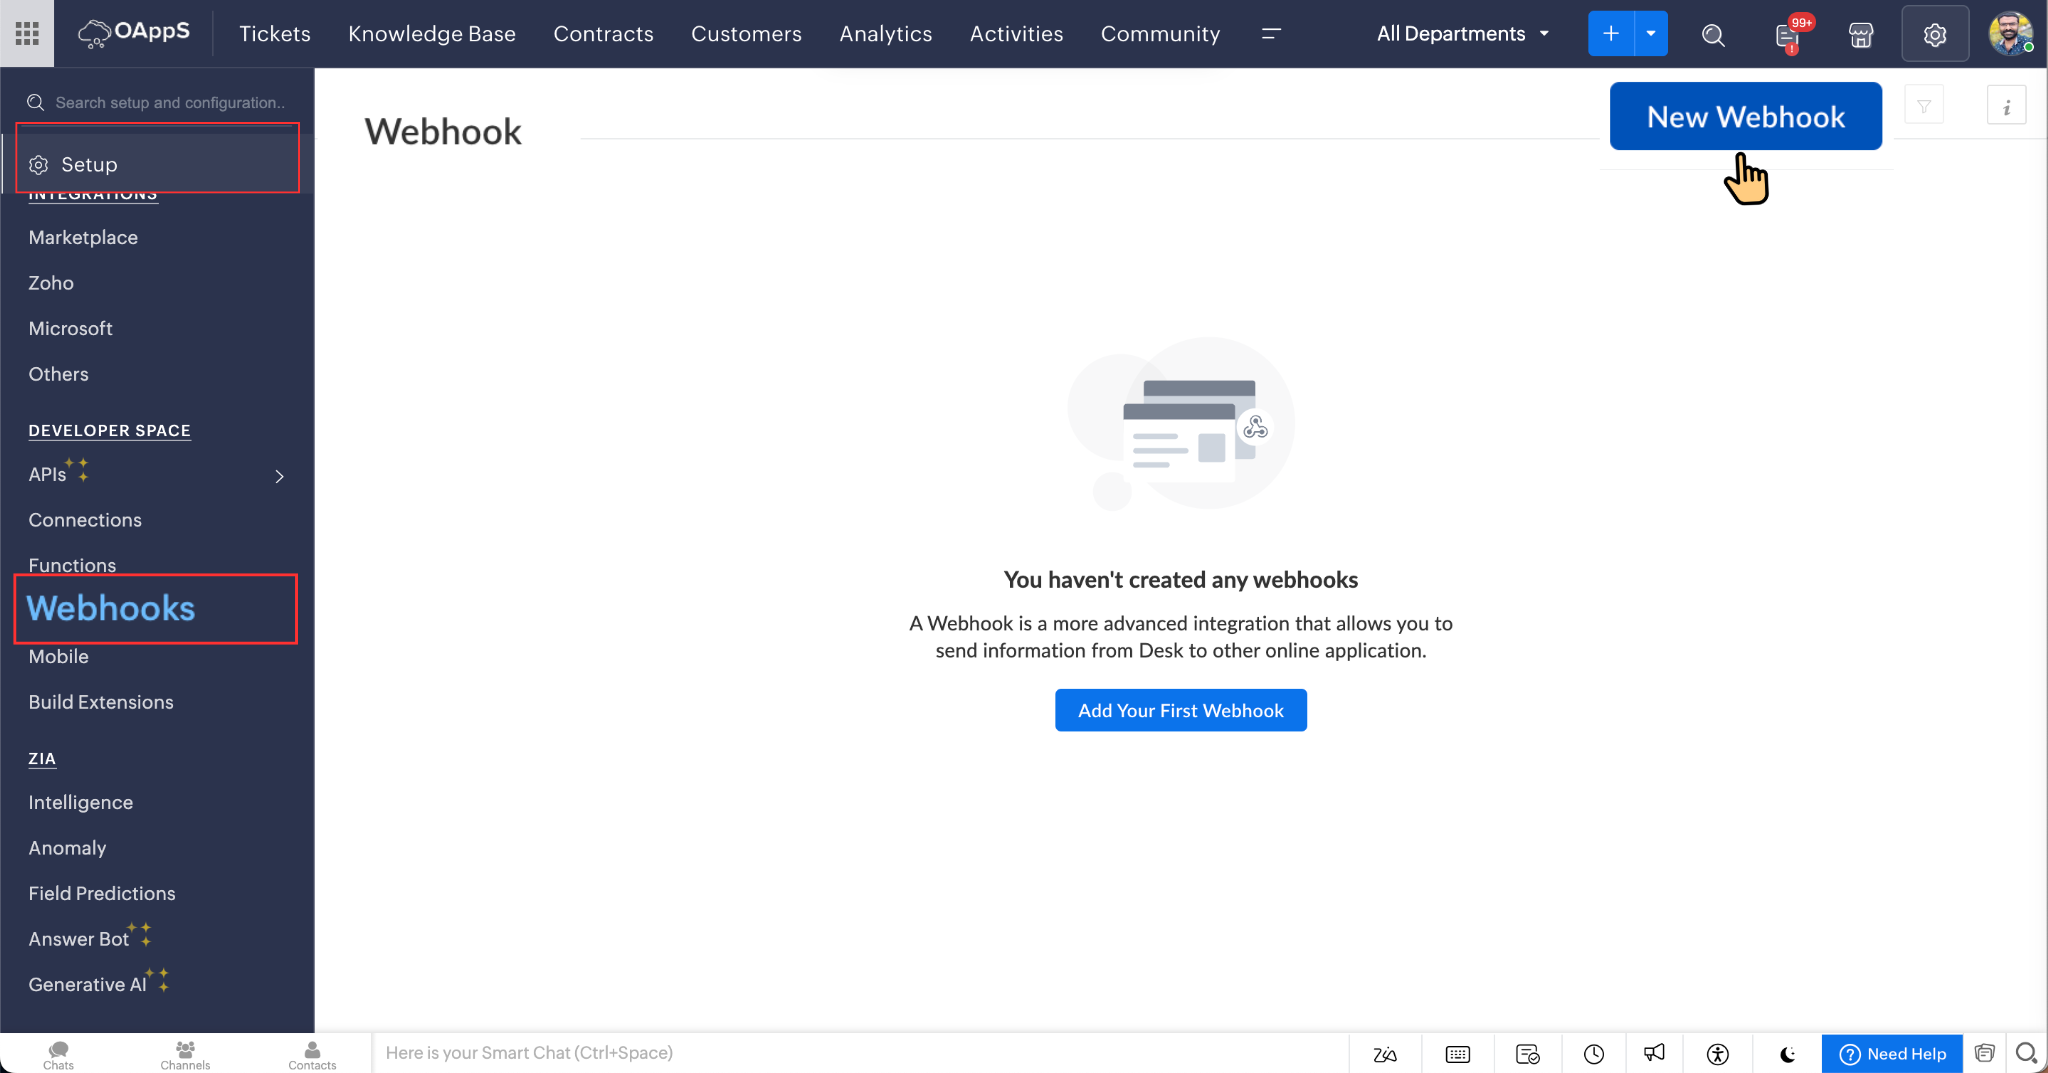
Create the webhook in Zoho Desk
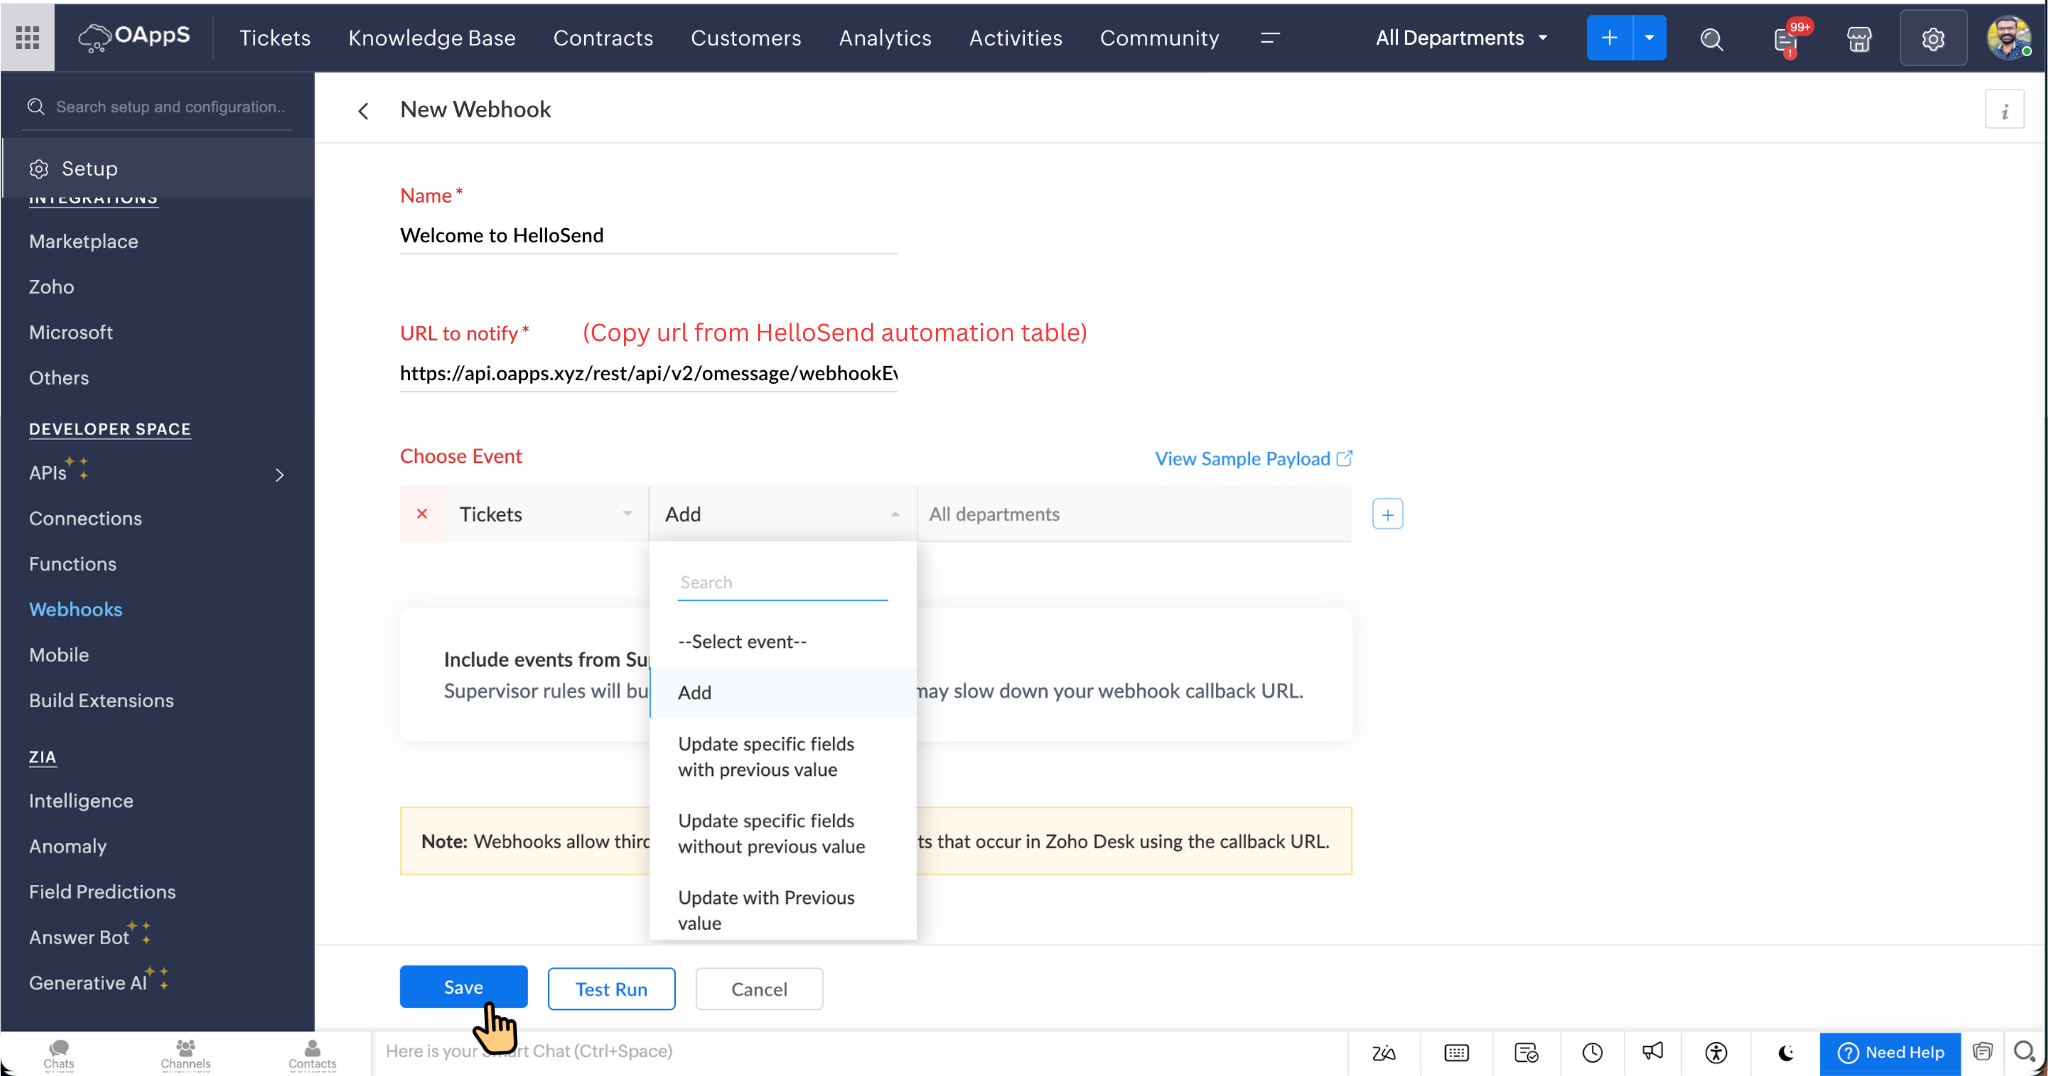
- Navigate to Webhook Settings: Go to Setup, search for Webhooks, open the Webhooks section, and click New Webhook.
- Friendly Name : A label to help identify your Webhook easily
- URL to Notify: Copy the Webhook URL from the HelloSend Automation table and paste it into URL to Notify.
- Choose Module & Event: Select the Module (e.g., Tickets, Contacts, Accounts). Pick the Event(s) to trigger on: Add, Update, Add Attachment (choose the ones you need).
- Choose Department: From the department dropdown, pick the relevant department where this webhook should be applied (e.g., Support, Sales, or All Departments).
- Tip: at minimum include an identifier (ticketId) and a delivery target (phone or contactId).
- Save & Test Click Save, perform a test action (e.g., update a ticket), then check HelloSend → Logs to verify the webhook hit and message dispatch.
- Activate Enable/turn on the webhook rule. (If you used an automation/rule framework, toggle it to Active.)
Automation Tracking & Monitoring
- In HelloSend, go to Messaging → Automation → Webhook.
- Find the automation you created and expand it to see full details.
- View delivery status, track customer responses, and analyze performance reports in real time.
✅ Benefits of Zoho Desk Automation with HelloSend
Instant notifications
Customers receive real-time SMS | WhatsApp | RCS | Twilio WhatsApp notifications whenever a key event occurs in Zoho Desk, such as ticket creation, assignment, or status updates. This eliminates the need for manual agent updates, saves time, reduces errors, and keeps customers informed at every step.
Consistency at scale
Every notification uses pre-approved templates, ensuring accurate and consistent messaging across all interactions. Automation guarantees the right content is delivered at the right time, even as your customer base and ticket volumes grow.
Better Customer Experience (CX) & SLA Compliance
Automated updates help teams respond faster and maintain stronger engagement with customers. By eliminating delays, you can easily meet your response and resolution SLAs while improving customer satisfaction and reducing repeat follow-up requests.
Full visibility & compliance
Every message and response is automatically logged within HelloSend and Zoho Desk, providing a clear audit trail.
📌 Conclusion
With a simple webhook rule, Zoho Desk and HelloSend work together to automate customer communications from ticket events—saving agent time and keeping users informed. Start with one or two high-impact triggers (e.g., Ticket created → "We've received your request") and expand to status changes, assignment notices, or closure/CSAT nudges. For best results, use clear template language, include essential ticket context, and always honor consent/opt-outs.