Step by step: Open Admin Settings
- Sign in to HelloSend.
- Go to Settings → Admin Settings.
🧾 Logging Preference
What is Logging Preference?
The Logging Preference setting controls how HelloSend automatically records your sent and received messages inside Pipedrive. Every message can be saved as a Note or an Activity, depending on what you choose.
This keeps your full communication history—SMS, WhatsApp, and call logs—attached to the correct Person, Deal, or Organization record in Pipedrive, so teams always see the latest context in the CRM timeline.
Why it’s useful
- Maintains an accurate, auditable record of every conversation.
- Gives sales/support instant visibility without leaving Pipedrive.
- Keeps automation workflows reliable (e.g., activity-based follow-ups).
- Reduces duplicates by logging to the most relevant record.
💡 Tip: If your team uses automations for inbound messages, select Activities. It provides the best structure for tracking, filtering, and reporting.
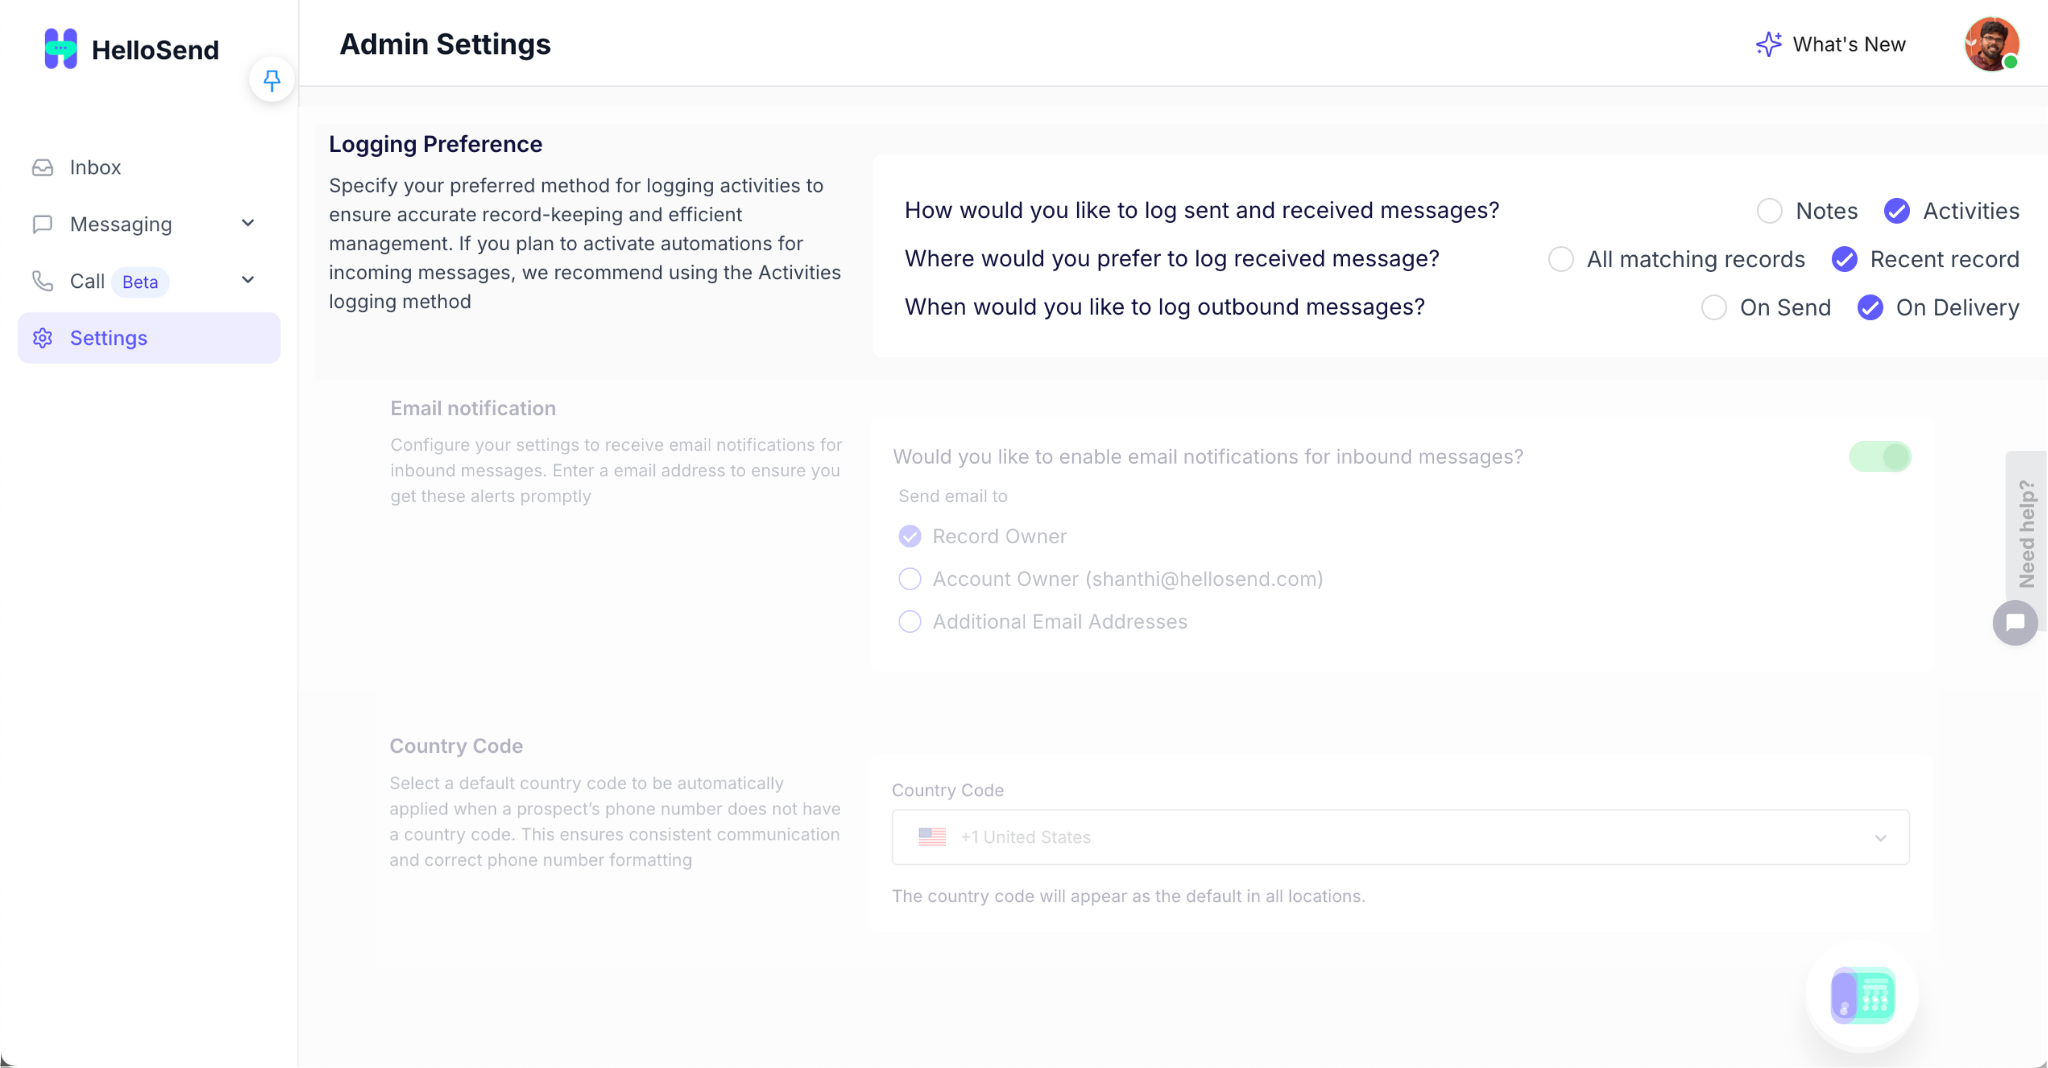
How would you like to log sent and received messages?
Choose how your messages appear inside Pipedrive:
Notes
Messages are added as notes under the related person or deal.
👉 Use this if you just want a simple record.
Activities (Recommended)
Messages are logged as CRM activities.
👉 Best choice if you use automations or want detailed communication tracking.
💡 Tip: Select Activities if you plan to use message automations or workflow triggers.
Where would you prefer to log received messages?
Decide where HelloSend should log replies from customers:
All Matching Records
Logs the message to all related records (Person, Deal, and Organization).
👉 Good for shared numbers or team-wide visibility.
Recent Record (Recommended)
Logs the message only to the most recent matching record.
👉 Keeps your CRM tidy and avoids duplicate entries.
When would you like to log outbound messages?
Choose when to log messages that you send:
On Send
Logs messages immediately after sending.
👉 Helps teams monitor activities in real time.
On Delivery
Logs messages once they're successfully delivered.
👉 Ensures the message is only recorded after confirmation.
Why it matters?
Properly setting up your Logging Preferences is essential for keeping your CRM organized and ensuring that every message or call your team handles is captured in the right place. This not only improves visibility and accountability but also helps teams work faster with confidence.
Here’s why it matters:
- Keeps all message records organized and easy to find: Every SMS, WhatsApp, or call log is saved under the correct contact or deal, giving your team instant access to previous conversations and reducing time spent searching.
- Prevents duplicates and improves CRM cleanliness: By controlling where messages are logged (e.g., most recent record only), HelloSend avoids unnecessary duplication across records and keeps your CRM tidy.
- Ensures automation and reporting use accurate data: When your logs are clean and structured, your automated workflows and reports pull the right information — improving analytics, follow-ups, and campaign tracking.
- Strengthens collaboration: All team members can view the same conversation history, making it easier to pick up where others left off.
- Enhances compliance and transparency: A consistent logging method ensures complete communication trails for auditing or client review.
💡 Tip: Review your logging setup once every few months — especially if you’ve added new team members or automated workflows — to make sure everything continues syncing correctly with Pipedrive.
📩 Email Notification
What are Email Notifications?
Email Notifications in HelloSend keep you instantly informed when a customer replies to your SMS or WhatsApp message — even if you're not logged in to Pipedrive or HelloSend at that moment. This ensures your team never misses a response, no matter where they are working from.
Each inbound message triggers a notification email that includes the sender’s name, message content, and a quick link to open the related record directly in Pipedrive. This helps you or your team respond quickly and maintain consistent customer communication.
Why it’s useful
- Stay responsive: You’ll get alerts immediately when customers reply, even outside business hours.
- Centralized tracking: Notifications include direct links to CRM records for quick access.
- Shared visibility: Admins can configure notifications for record owners, account owners, or shared inboxes.
- Better follow-ups: Email alerts help prevent missed leads and improve response time for active deals.
💡 Tip: Use a shared inbox (like sales@yourcompany.com) if multiple team members handle inbound messages, ensuring no customer reply goes unnoticed.

Would you like to enable email notifications for inbound messages?
Yes! Simply turn on email notifications and choose who should receive them.
You can send alerts to:
- Record Owner – The Pipedrive user who owns the record.
- Account Owner – For example, shanthi@hellosend.com (main account admin).
- Additional Email Addresses – Add one or more extra emails for team members or shared inboxes.
🔔 Tip: Use a shared email (like sales@yourcompany.com) if multiple team members handle customer replies.
Why it matters?
Setting up Email Notifications ensures you and your team never miss an important customer message. Whether you’re working inside Pipedrive, in meetings, or away from your desk, HelloSend will instantly alert you when a customer replies to your SMS or WhatsApp message. This helps maintain consistent, fast, and professional communication with every lead.
Key benefits
- Never miss an important message: Stay informed even when you’re not logged into HelloSend or Pipedrive. Every inbound customer reply triggers a quick alert directly to your email.
- Faster follow-ups and responses: Email notifications help your team act quickly — reducing response time and improving customer satisfaction.
- Team-wide visibility: Both admins and sales users can receive notifications, ensuring everyone stays aligned on ongoing conversations and customer updates.
- Custom delivery options: You can send alerts to record owners, account admins, or additional shared inboxes like support@ or sales@ to centralize communication.
- Improved accountability: By logging who receives alerts and when they respond, managers gain visibility into team responsiveness and workload distribution.
💡 Tip: For teams managing high message volumes, use a shared email or ticketing system (like Zoho Desk or Zendesk) as your notification address — this keeps every reply tracked and assignable.
🌍 Country Code
What is Country Code?
The Country Code setting in HelloSend ensures every outbound message — whether it’s SMS, WhatsApp, or voice — includes the correct international dialing prefix, even if the contact’s phone number doesn’t have one saved in Pipedrive.
When your CRM data includes numbers without prefixes (for example, 9876543210), HelloSend automatically applies the selected default country code (like +1 for the USA or +44 for the UK) before sending your message. This helps your communication reach customers globally without delivery errors.
Why it’s useful
- Ensures successful delivery: Messages are formatted correctly for each country’s telecom network.
- Improves consistency: Keeps phone numbers uniform across records, reports, and automation workflows.
- Eliminates manual edits: No need to add prefixes manually when importing or syncing contacts.
- Supports global teams: Ideal for businesses managing leads across multiple regions.
💡 Tip: Always set the default Country Code that matches your primary customer base. For example, choose +61 (Australia) if most of your contacts are based there — you can still send messages to other countries by including their code manually when needed.
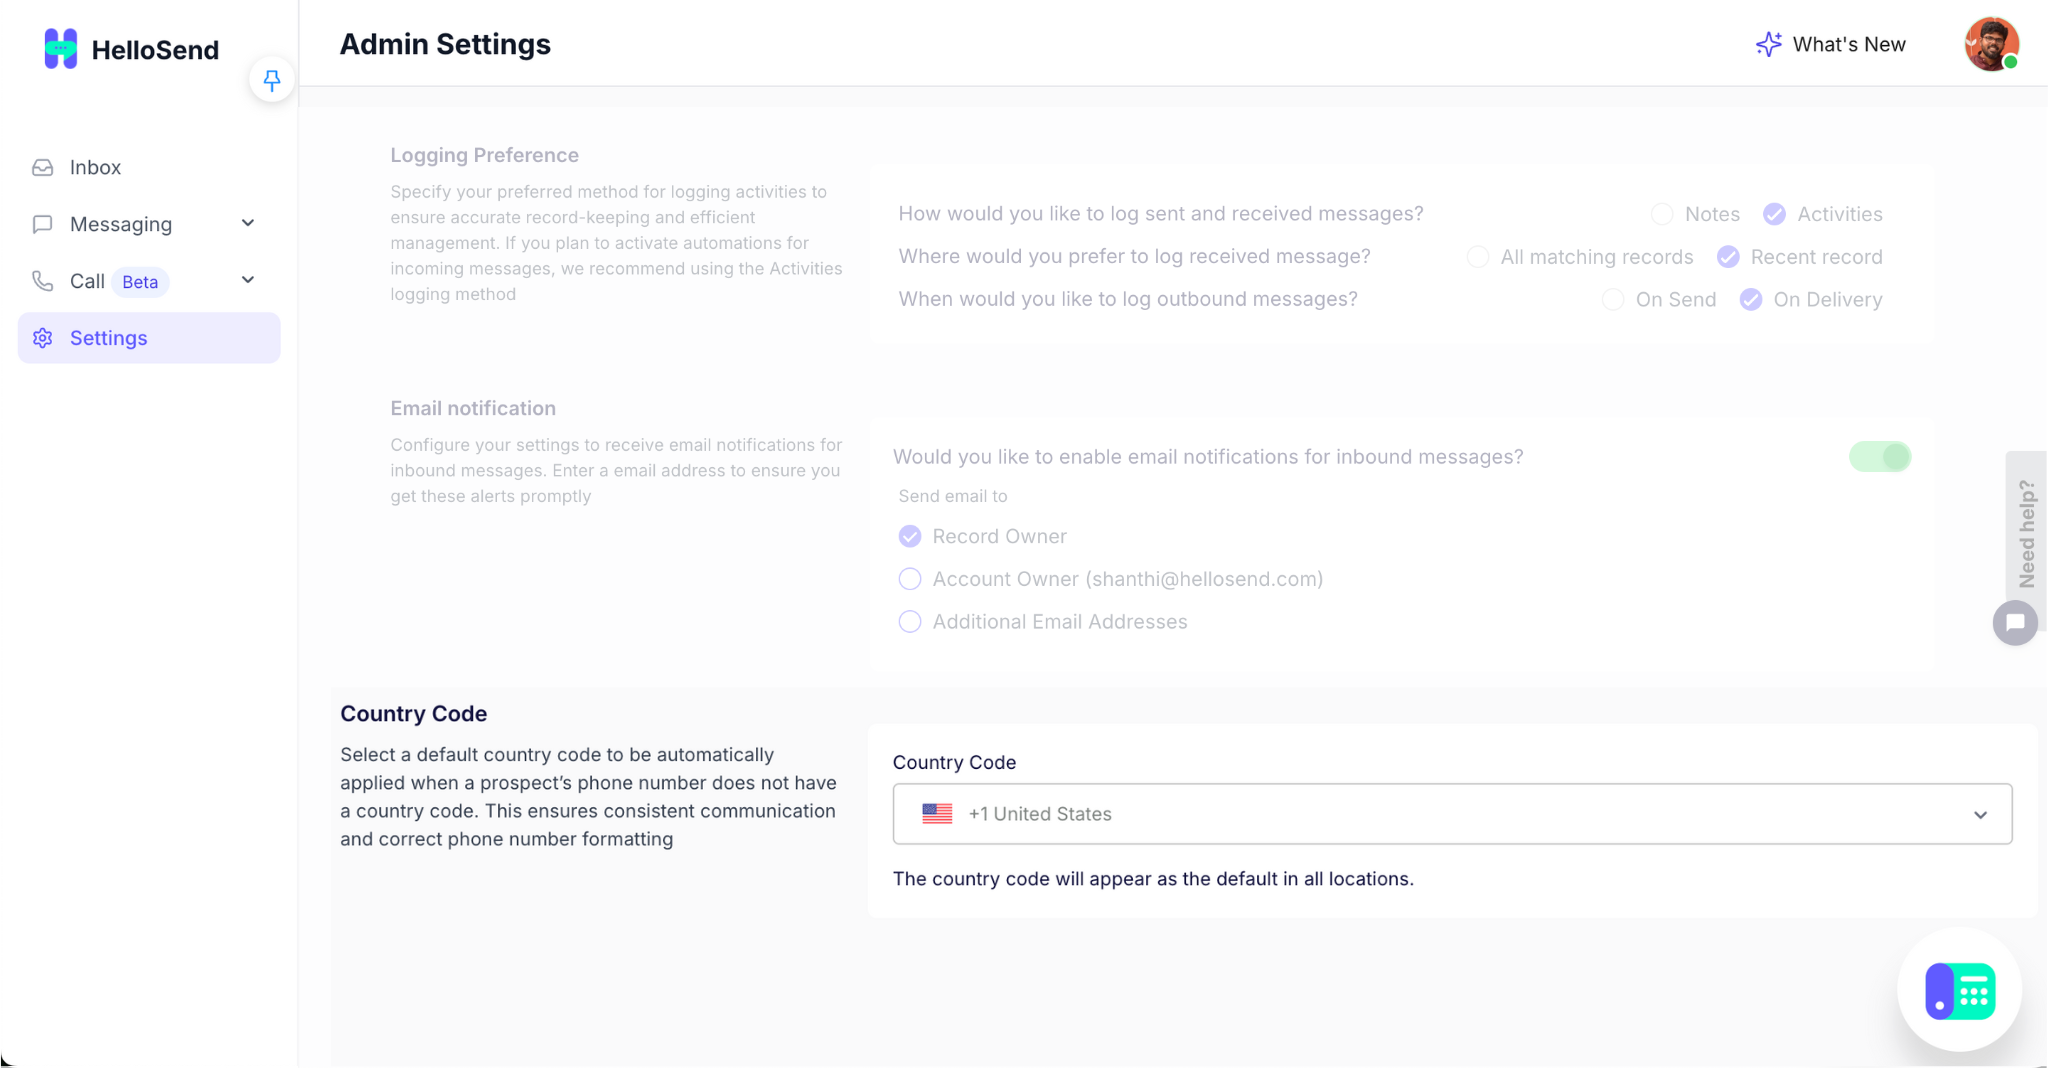
How to set your default Country Code?
- Open HelloSend → Settings → Admin Settings → Country Code.
- Choose your preferred country code from the dropdown list.
- Click Save Settings.
Example:
If you select +44 (UK) and your contact number is 9876543210, HelloSend will automatically send messages to +449876543210.
Why it matters?
Setting a default Country Code helps ensure every message you send reaches the right contact, no matter where they are located. It’s especially important for businesses that communicate across different regions, as not every CRM record includes an international prefix. With a default code in place, HelloSend fills in the missing details automatically, keeping your outreach accurate and consistent.
Key benefits
- Ensures your messages reach the correct phone number: Adds the proper international prefix so your texts and calls are routed correctly, even if the number in Pipedrive is incomplete.
- Avoids sending or delivery errors: Prevents failed deliveries and invalid number issues caused by missing or incorrect codes.
- Keeps phone numbers consistent across records and automations: Ensures uniform formatting for contact numbers across all HelloSend modules, integrations, and workflow triggers.
- Reduces manual data cleanup: Automatically applies a clean format, saving time on editing imported or synced contact lists.
- Improves campaign accuracy: Bulk messages or drip campaigns reach the intended audience without misrouted or undelivered texts.
💡 Tip: If your team serves multiple countries, create contact filters or pipelines per region and update the default Country Code as needed before running campaigns — this ensures localized communication and avoids cross-region misroutes.
👥 Roles & Permission
What are Roles and Permissions in HelloSend?
HelloSend supports Role-Based Permission Management, allowing administrators to control what each user can see and do inside the platform. This ensures team members only access the features and data relevant to their work.
By default, HelloSend provides two predefined roles:
- Admin: Full access to all settings, integrations, and communication features.
- User: Limited access focused on daily communication and assigned records.
Admins can also create custom roles to match your organization's structure — e.g., a Support Agent role for customer communication or a Sales Manager role with extended campaign visibility.
How to manage Roles and Permissions
The Roles & Permission section in HelloSend allows administrators to define what each user in your team can access and manage inside the platform. With clear role assignments, you can ensure sensitive data is protected, users see only what they need, and every feature in HelloSend stays properly governed.
Step-by-step guide
-
Go to Settings → Users → Roles & Permission.
This opens the main permission panel where all roles are listed — including the default ones (Admin and User). - Review existing roles: Check what permissions each current role has before making changes. This helps you avoid overlapping access or missing privileges for your users.
- Create or edit roles: Click Create Role to define a new one, or Edit next to an existing role to modify its permissions. Give your role a clear, descriptive name (e.g., “Support Agent” or “Sales Manager”).
-
Set permissions for specific areas:
Decide what actions users under that role can perform:
- Messaging: Control who can send, view, or manage SMS and WhatsApp campaigns.
- Calls: Assign who can make outbound calls, record calls, or access call logs.
- System Settings: Define who can modify integrations, billing details, or other admin-level preferences.
- Automation & Templates: Manage who can create or edit workflows, message templates, or campaign schedules.
-
Click Save Changes once you’ve finished editing.
All updates apply immediately to users assigned to that role.
💡 Tip: Review permissions quarterly or when adding new HelloSend features to ensure users only have the access they need. This keeps your system secure and your team’s workflows efficient.
Example:
If you’re managing a large sales team, you could create:
- Sales Manager Role — Full access to campaigns, analytics, and automation setup.
- Sales Rep Role — Limited to sending messages and viewing assigned contacts only.
- Support Agent Role — Access to reply to WhatsApp messages but not modify automation or billing settings.
Why it matters?
- Keeps sensitive data and settings secure.
- Helps large teams organize access based on responsibilities.
- Prevents accidental changes to key configurations.
- Makes onboarding easier by assigning predefined roles to new users.
🏁 Conclusion
Setting up these three Admin Settings — Logging Preference, Email Notification, and Country Code — ensures smoother communication, accurate tracking, and faster responses in HelloSend for Pipedrive.
Once configured, your entire team will have a unified, reliable messaging setup that saves time and improves every customer interaction.